Showing posts with label acrylic. Show all posts

Wednesday, August 7, 2013

Blue Trio Clematis painting in acrylic.

Blue Trio Clematis painting
40x60cm
Acrylic on box canvas so no need for a frame


I painted this clematis painting en plein aire a few years ago. I liked the composition but struggled with the background and eventually settled on a yellow complement background. It has been hanging on my wall since then but the background always bugged me. Last week I had the urge to redo the background and settled on this pale ochre background with a touch of orange. I like it a lot now and I think sets off the clematis flowers nicely. Unfortunately, I lost my previous photos in a computer crash so cannot show you the old painting for comparison. It is funny how some paintings have to sit for a while waiting for the right time for inspiration to strike and become finished.

Contact me about this or any other painting HERE

Wednesday, January 11, 2012

Orchid Crowd WIP - Acylic painting

Orchid Crowd by Marion Hedger
50x60 cm 20"x24"
Acylic on canvas

Here are some WIP pics for this painting
Stage 1
The colourful underpainting using warm colours for the highlights and cool colours for the shadows.

Stage 2
Making the colours look more real. A true fauvist's delight
 Stage 3
Breaking up the areas more and more. It is starting to come alive now.

After this stage there is more and more refining. Unfortunately I forgot to take photos - as so often happens I get carried away.


Monday, January 9, 2012

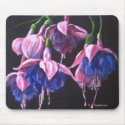
Dancing Fuschias Acrylic Painting

This is one of my earlier works that I realise I have not previously shared with you.
 Dancing Fuchsias by Marion Hedger
Acylic on box canvas
40x40x5cm (16"x16"x2")
My Website  
This was one of my first paintings on a black gessoed background. I cropped a larger photo to obtain the a more macro image and generally scumbled all the colours on until the depth of colour required was achieved, but first I gradually lightened the highlights with a thin scumbling of white. The darks have less layers than the light areas, especially the deeper darks. That is one of the advantages of the black background it creates some lovely darks, although I never leave the pure black showing.
This image is also available as a mousemat from Zazzle

Saturday, September 17, 2011

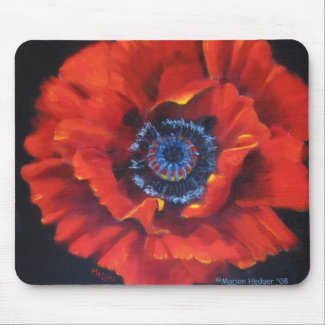
Red Poppy on Black

Red Poppy on Black by Marion Hedger
30x30cm Acrylic on box canvas
NFS but commissions accepted
I painted this for my Mum on her 80th birthday as poppies were her favourite flower.

I started with a black gessoed canvas, roughly sketched in the flower and then started scumbling in white paint for the highlights. After obtaining the basic shape plus shadow areas, I used a yellow for the brightest part of the petals followed by red. I used a scumbling technique throughout varying the layers. The shadow areas were left quite lightly scumbled, with more or less pressure depending on the extent of the shadow.

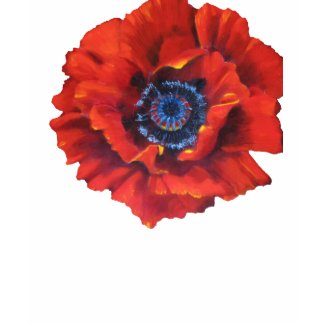
Some of my Zazzle product featuring this painting:


Thursday, May 19, 2011

Cup cake fun

After the success with my bronze iris, I started on a yellow iris. Yellow is such a hard colour and I have found it hard work. I decided I needed a break from the concentrated work and had a bit of fun with these. Cup cakes seem to be the rage at the moment - and the best part is that they have no hip expanding calories!
They are all 5"x7"
Acrylic on canvas board

Monday, June 29, 2009

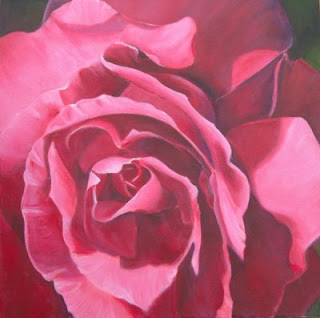
Pink Rose


Pink Rose
Acrylic painting
40x40cm on box canvas
 
I painted this rose as part of a monthly challenge on wetcanvas.
The challenge was to paint a rose macro in a colour you found difficult. I always find pinks difficult as they can come out either too sugary, too blue or too red.


The reference is from a rose in my garden. The area where I live, used to be very well known for growing roses for the perfume industry in Grasse. This rose was planted by the previous owners of my property.


Stage 1, Underpainting.
The rose was drawn onto the canvas using watercolour pencil. I then blocked in the darks using cool colours e.g. purple, blues, blue greens and greens, and the lights using warm colors oranges, reds and yellows. I used yellow for where I wanted the lightest highlights.


Stage 2


Paint was added to each area to make the colour look more 'real' I used alazarin crimson for the shadows and permanent rose for the lighter areas, mixed with white to a lesser or greater extent. I used titanium white and some mixing white.


The mixing white makes the colour more transparent, but titanium white gives a better colour, although it is quite opaque. I also mixed the alazarin crimson with ultramarine blue in places.
The paint was added dry, with a scumbling motion. Several layers were used to help get the correct tone.


Stage 3
More pink - permanent rose plus white was added to the light areas. A red layer was also added to the darker areas to give a warmer shadow and then overpainted with alazarin crimson.
To get to stage 4 (the finished piece) I scrumbled a layer of permanent rose all over, before putting on the last coats of pink. The permanent rose layer helped to lessen the 'chalky' look of some of the pink. I also used much thicker paint on the light petals.
Lastly, I used a lot of white in the highlights to give a very light pink and increase the contrast at the focal point.

LinkWithin

Related Posts Plugin for WordPress, Blogger...